What I Wish I Knew Before Using Peel & Stick Wallpaper
When I first started experimenting with peel & stick wallpaper, it was like any other DIY I do for the first time – intimidating, exciting, and also can’t shake the feeling of ‘how is this going to go?’ Will I regret or love it by the end?! What I found was a fun way to add my personality to my home with a small side of frustration at the application process. But don’t let hearing that talk you out of it. It’s just a matter of figuring out a few things along the way. Which is exactly what I want to share with you now!
If you’re thinking about giving peel & stick wallpaper a try, here’s what I wish someone had told me before I dove in.
Quick note: This post contains affiliate links. If you purchase something from a link, I will receive a small commission. This is at no extra cost to you! Thank you for your support!
It’s Not as Effortless as It Looks on Instagram
Don’t get me wrong; I obviously think peel & stick wallpaper is a really great DIY project or I wouldn’t be writing about it! But the fast timelapse videos on social media don’t always show the reality: panels that don’t quite line up, sticky repositioning, and a lot of smoothing (and resmoothing). It’s absolutely doable, but not always effortless.

Your Walls Matter
If your walls are textured, dusty, or not totally clean, the wallpaper may not stick well. Before starting, wipe down your walls with a damp cloth and let them dry completely. If your walls are textured, you may need to lightly sand or even skimcoat them to create a smooth surface.
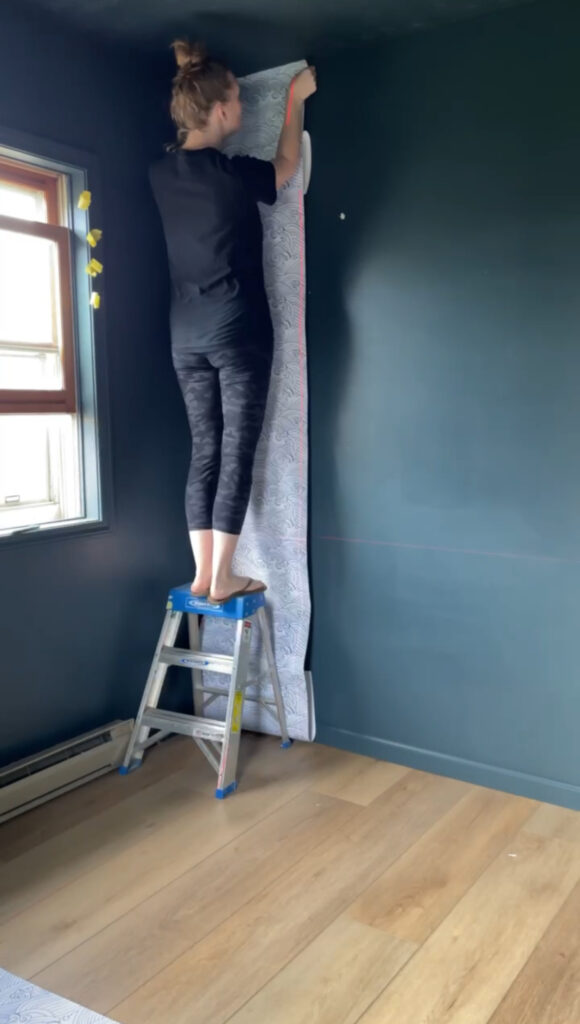
Use a Level to Hang the First Piece & Start With a Small Overlap
Walls are rarely perfectly level. To make sure that you hang your wallpaper level, set up a laser level for your first piece (this is the one I use). You should also hang the first piece with an overlap slightly onto the wall to the left. If you line up your wallpaper exactly with the edge of the wall at the top, you may find yourself with a gap near the corner as you go down. Leaving a bit of overlap gives some wiggle room and ensures the entire wall gets covered, even if corners aren’t perfectly straight.

Peel Back a Little at a Time
If you want to feel like you’re throwing money out the window, get a piece of peel & stick wallpaper stuck to itself. Pulling it apart will be nearly impossible, and if you do get it, the paper will be stretched out and won’t line up anymore. I guarantee you’ll have to throw that piece of wallpaper away. But am I speaking from experience?!
To avoid this, peel back just a few inches of the backing at a time. Start at the top and slowly work your way down. This will also give you more control as you smooth it and helps to prevent air bubbles, wrinkles, and misalignment.

Tools Make a Big Difference
You don’t need fancy equipment, but having a few basic wallpaper tools will make your life much easier. I recommend (and own) this kit. Use the wallpaper smoother to press out any bubbles. (If you get a bubble that just won’t budge, use a tiny pin to prick it. This will release the air and make it disappear.) Trim edges with the utility knife. Change the blade often to get the cleanest cut. Simple, but both very helpful for your wallpaper application!

Don’t Stress About It!
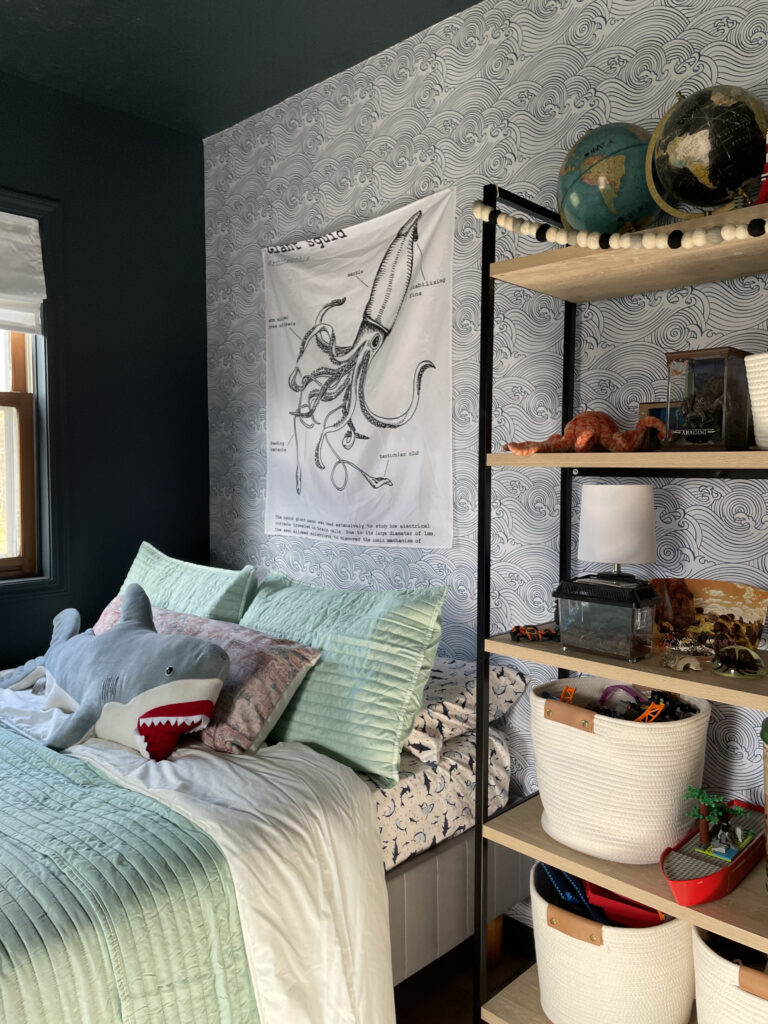
Don’t stress over little imperfections. Once it’s all done, you won’t notice them. I promise. Despite the learning curve, peel & stick wallpaper will completely transform a space.
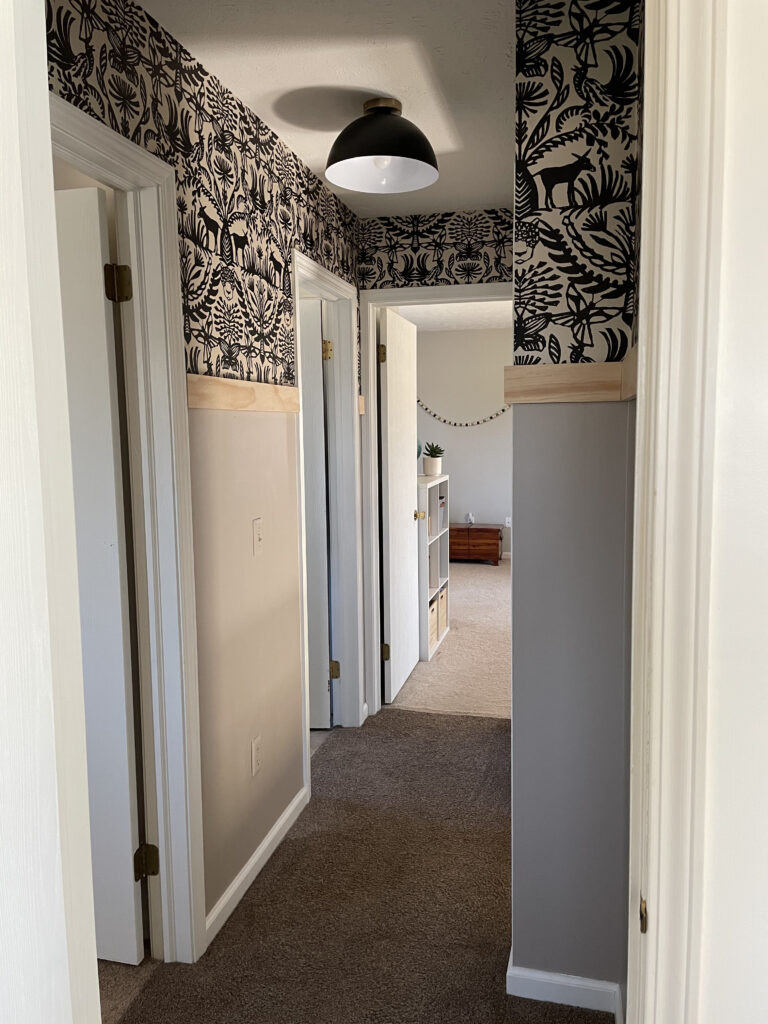
I think for awhile wallpaper had been synonymous with outdated floral patterns and known for being incredibly difficult to remove from a wall. But peel & stick wallpaper makes a DIY friendly option to add some character to your home and create a space that feels like you. There are so many patterns to pick from and lots of options on any budget.
Remember: prep is key, take your time, and use the right tools. The best DIYs are the ones you learn from along the way!
Thinking about trying peel & stick wallpaper? I’d love to hear your questions—or see your finished projects!